|
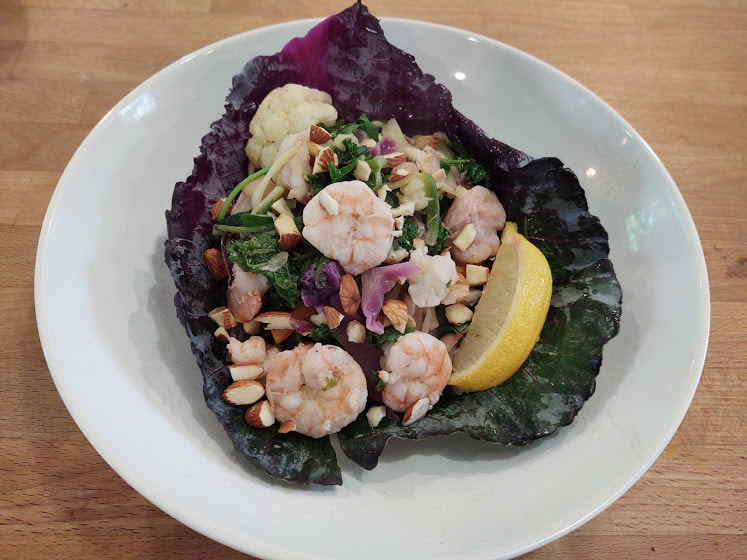
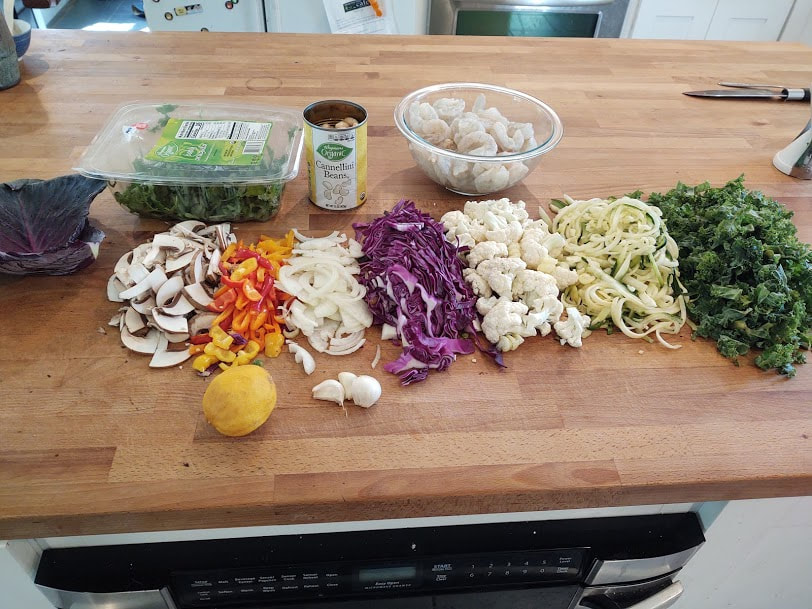
Hi All!! Before diving into this easy and quick recipe, I want to thank everyone for patiently awaiting some new food ideas :) We have finally had a break in the weather and Emi, Chris and I have been doing lots of outside work around the farm. Before we know it, it's bedtime for Em which usually results with one of us fallen asleep on her floor. In Chris's case mid sentence telling Emi stories ;) [Editors Note aka Chris: That story is 100% accurate, it happened again last night!] It has been a time we've needed quick meals to keep moving or to get to bed before a certain toddler expires!! This meal definitely fits that criteria AND depending on what you have in your fridge it will supply you with that infamous "rainbow" you should be eating. Lets get rockin! What we used for this meal: 2 lbs of wild caught shrimp, pealed and deveined Red and Yellow Organic bell peppers Chopped Kale Arugala Onion Zucchini Cauliflower Red Cabbage Mushrooms Garlic Lemon Almonds Cannellini Beans Olive Oil I'm sure if you are following along with our recipes or videos you'll recognize the theme of, 'Use what you've got!!' So no real measurements for this recipe; just grab what you have or buy what you want in the veggie department! Slice and dice your veggies however you like to eat them. We used about 1/4 of a cabbage, a few mini bells, a handful of mushrooms, one small white onion, a few handfuls of kale, 2 smallish zucchini's (easy for my little hand zoodler) 1/2 small head of cauliflower, 3 large clove of garlic and 1/2 lemon. You'll want to have a large large sautee pan with a lid to make this or take it to the oven! I'll note that modification at the end. We used a 12 inch deep sautee pan. Coat your pan generously with olive oil, add chopped garlic and start pan on medium heat. Don't wait for garlic to cook, just start throwing veggies in with longer cooking ones on the bottom and shorter cooking ones on the top, leaving any greens and the zoodles out of the pan for now. 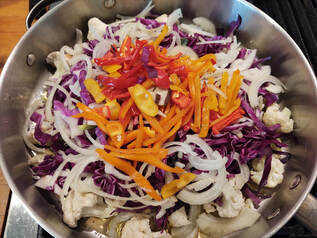 Salt and Pepper to taste and cover. Let cook and "steam" for about 3-4 minutes, stir the veggies in the pan, add your thawed shrimp to the pan, and recover. Let cook for another 4-5 minutes. Check to make sure shrimp is starting to turn pink and firm up. If it is, add the beans and kale and mix it and the shrimp into the existing veggies. Squeeze 1/2 lemon over everything and add more salt and pepper (or any other spices you like) to taste. Stir everything up and allow it to continue to cook uncovered until shrimp are cooked through and firm. 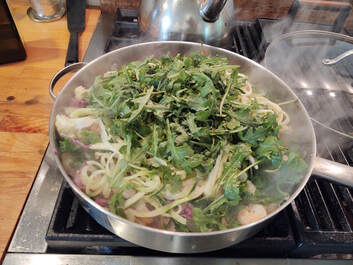 Once shrimp are cooked through and firm, add zoodles and mix them in with a tong, then top with arugula, remove from heat and recover for 1-3 minutes. It's now ready to serve. We served this with chopped almonds on top and a wedge of lemon. If you needed to you could bake all of this at 400 for about 20 minutes. I would toss everything together except the greens and zoodles (shrimp, veggies, beans) with olive oil, garlic, salt and any spices. I would turn the oven off mix in greens and zoodles and let stand for a few minutes hot in a serving dish or in the pan it baked in to wilt the greens and zoodles and serve. Some Food for thought, pun intended :) We love Thai, Viatnamese and Italian foods. With just herbs this can easily transform into one of those flavors. Think about adding some mint, cilantro, peanuts and or lime for a Thai or Viatnamese flavor...or some tomatoes more garlic and basil to lean Italian. Swap up your protein, easily make it vegan... It is a very flavorful, quick versatile dish. I hope you enjoy it!
0 Comments
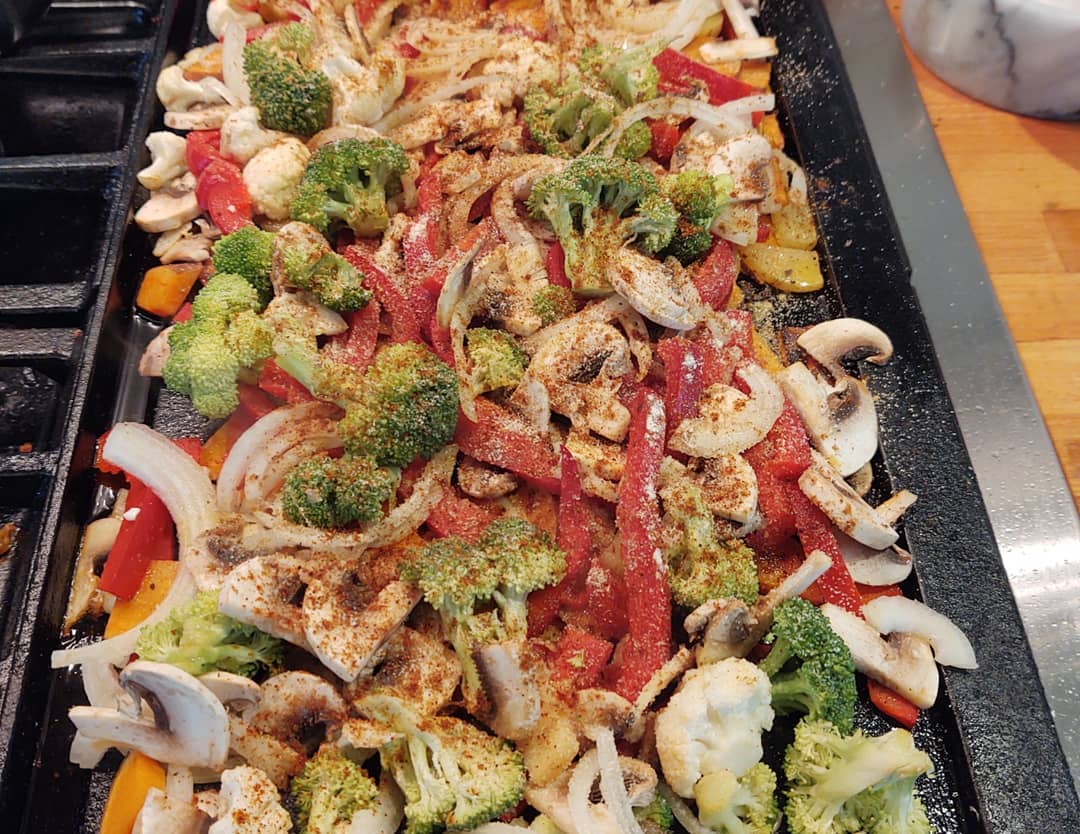
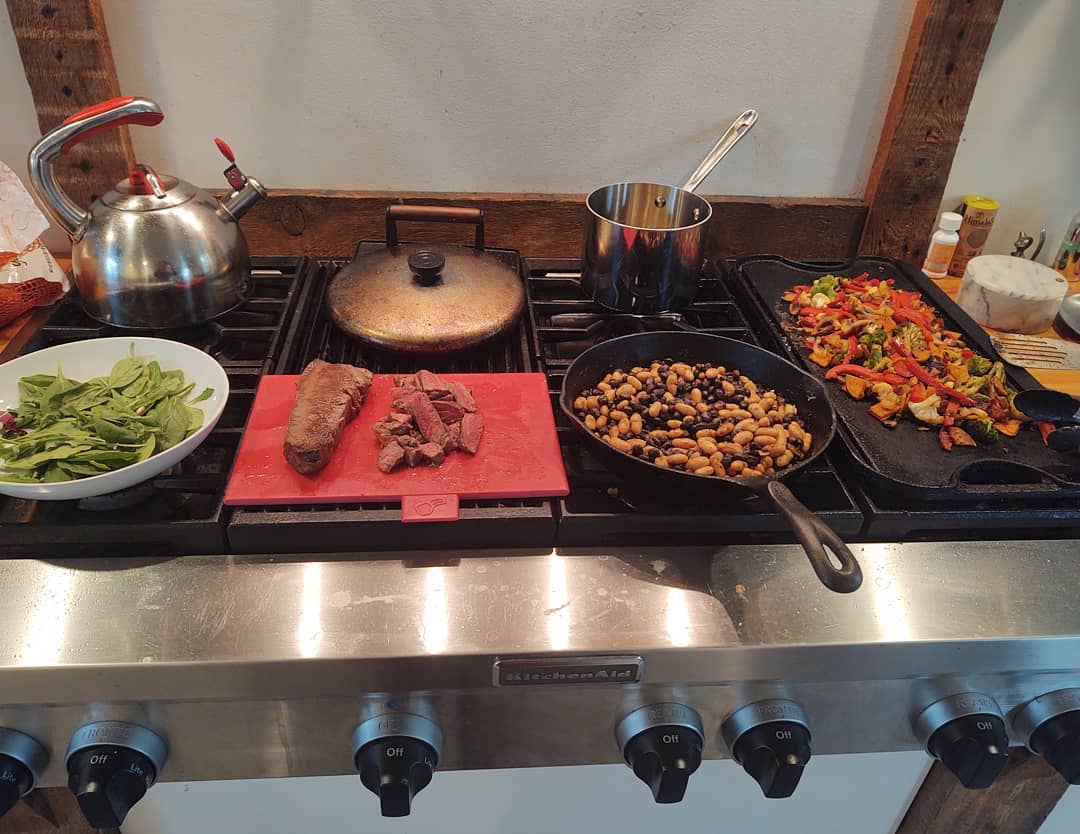
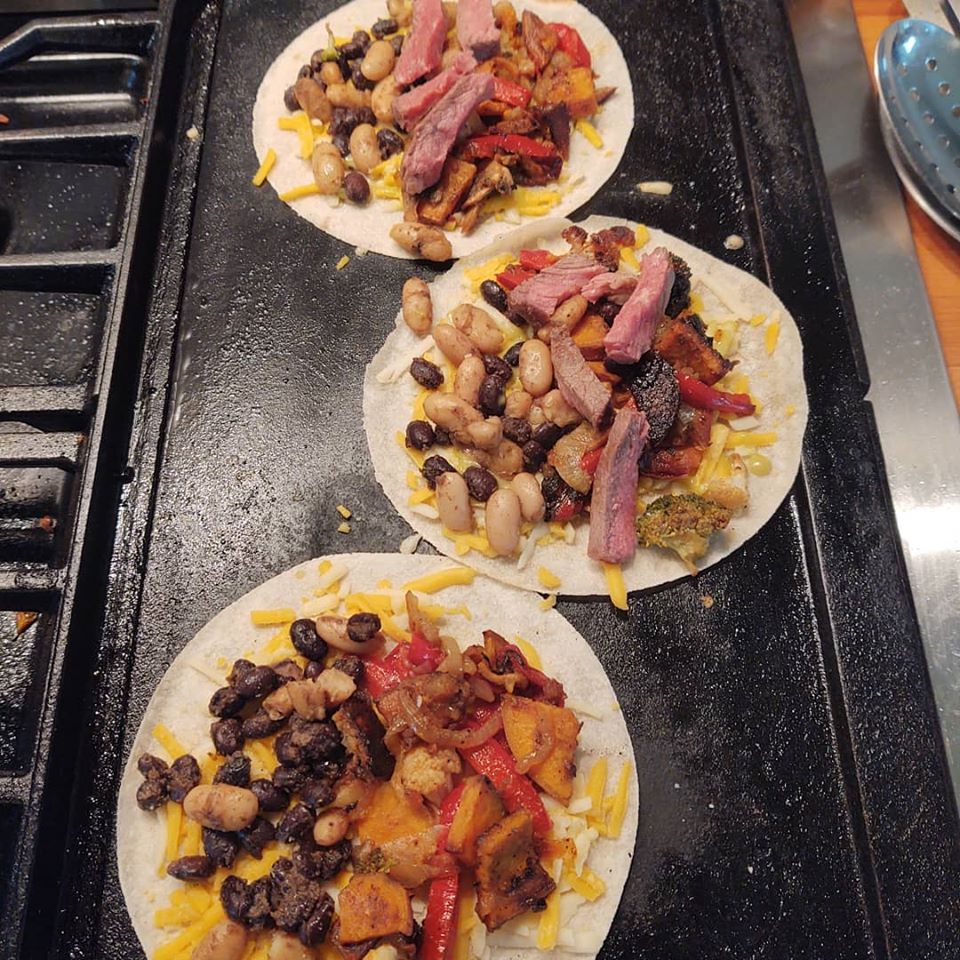
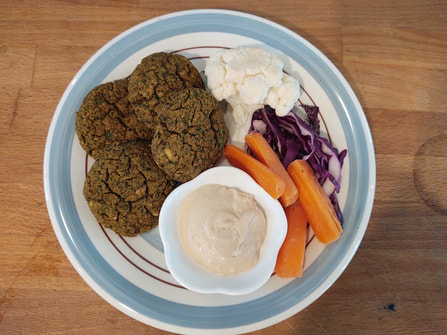 First things first...I hope everyone is doing well!! I know that you are all scattered across the country, and some of you are starting to get back to some semblance of 'normal.' Here in our Eastern Central area of PA we are still on a stay at home order, which means good things for you!! Like an Easy Easy Easy Falafel Recipe :) Chris and I (and now Emilia too) have always loved exploring all different kinds of food. Middle Eastern Foods is at the top of our favorites list, and I'm going to give a little shout out to Daddy's Place and Alladin. They are hands down our two favorite local go to's for incredible, clean, made from scratch family owned Lebanese Restaurants. I'm not going to lie, we miss our Saturday morning Easton Farmer's Market browsing where we stock up on all of our local goodies, often while snacking some falafel from Alladin's tent and catching up with Sam. She's always told me falafel was easy to make and to try it!! Well quarantine finally pushed my hand. I have no idea why I was afraid to try making falafel, but there you have it, it took years and a statewide shut down and here we are...home made falafel. Anyone who knows me will be shocked and stunned to know that I didn't follow a recipe (sarcasm), but browsed a few and went with ingredients we had and that I preferred to use. Not only was it super easy to make, it was delish. Lets get started!  Here's What We Used: A food Processor * 2 cans of Organic Chick Peas (strained and rinsed) * 1 bunch of organic parsley (about 2 loose cups) * 1 bunch of organic cilantro (about 2 loose cups) * 3-4 garlic cloves *4 tbsp chickpea flour (garbanzo bean flour) * 2 tsp salt * 2 tsp cumin * 2 tsp onion powder * 2 tsp black pepper * 2 tsp baking soda For Tahini sauce: 1/8 cup lemon juice (fresh or bottle) 1/4 cup tahini 1/8 cup cold water salt to taste  - Pre-Heat oven to 425F - While oven heats rinse and strain your two cans of chick peas. - Add all of your falafel ingredients to the food processor: chickpeas, chickpea flour, parsley, cilantro, garlic, salt, cumin, onion powder, black pepper, baking soda. Pulse to get started then turn on food processor to blend well. - Grease 1-2 cookie sheets, or line with parchment. - Make your falafel whatever size you'd like, we made small/medium sized ones. I used a 2 tablespoon melon baller/cookie scoop to scoop batter. Form your falafel into patties, and line up on cookie sheet about 1" apart - Bake falafel for 16-20 min (check and add a little time if you go with larger patties) Falafel is done when it is getting Golden on the outside and cracking a little across the outside. Makes about 20 small/medium size falafel. While Falafel is cooking whip up some tahini sauce! - in a bowl add lemon juice and then tahini. - blend with whisk until juice and tahini are incorporated. It's okay if the tahini is still a bit chunky and pasty the water will blend it well and thin it! - add small amounts of cold water and continue whisking and adding until well blended and creamy. You can add more water if a thinner tahini sauce is desired.  Have these as a snack, a side, a meal, in a wrap, you name it!! They are clean, healthy and packed with good protein and fiber. Another wonderful thing about these falafel, aside from being tasty and moist, is that you can add whatever you want to them. It's a simple clean recipe, feel free to season them with additional seasonings, add some additional ingredients, and come up with your own falafel based creation! We'll definitely be experimenting with this in the future! Leave us comments and let us know how yours came out! Hope you enjoy another M & Em Kitchen Creation!! 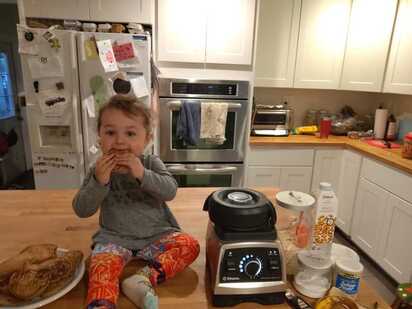 Seriously, who doesn't love pancakes (or pancakees as they have been renamed in our house by Miss Emilia), they can be sweet, savory, a bit of both. As McDonald's has proven, they are also fit to make delicious breakfast sandwiches! These ones are Kid approved, Gluten Free and Vegan, and NO one will know the difference, I promise!! These pancakes are a quick hitter and a regular staple in our house. Here is what you will need to start your "pancakee" adventure: A blender (or a whisk and a bowl if using oat flour instead of whole oats) 3 - 3 1/3 cups Oats (or oat flour) 2 cups Almond Milk (can substitute with any liquid including water) 1 banana 2 tsp salt 2 tsp baking soda 1 tsp baking powder Coconut Oil (or oil/spray of choice for pan or skillet) I'll start by saying if you don't have a blender that will eat your hand for lunch (like pictured vitamix above) you might be better off using oat flour for the first go around, or gradually add your oats in instead of tossing everything in at once. As you can see the ingredients are basic and so are the instructions. Lets get started!! * In your blender layer in the following order: Liquid (in our case we use almond milk) Banana, Oats, Remaining dry ingredients. * Turn your blender on a low speed (3 on our vitamix) and after it has started mixing all ingredients turn it up to medium/high (5-6 on vitamix, max when I use my family's Oster) and let it blend for roughly one minute * While blender is going, turn on and pre-heat your skillet or pan (we use cast iron and like to let it heat up for a 2-3 min before adding the batter) * Turn off blender. If batter is too thick (like paste) add some water and reblend. If batter is too thin (usually not the case) add some more oats and reblend. Let the batter sit a min or two as your skillet or pan heats and check again. **NOTE** The oats get thicker as they sit so it will thicken the batter a little. * Oil or spray your cooking surface with your oil or spray of choice, we use coconut oil. I advise against olive oil (especially good ones) because you will pick up their flavor in your pancake and it's usually not what you're going for :) * Test pan with a quick spritz of water to make sure pan is hot and pour your pancakes on to cook. * When pancakes start to bubble through out, flip them over. Voila!!! Pancakes!!! This recipe makes about 12-16 pancakes depending on thickness and size. The recipe can be halved very easily, I still use one whole banana for a half recipe. They cook like normal pancakes and they taste like normal pancakes. If you like your pancakes on the thinner "flapjack" side, add a little more fluid. If you like them thicker and fluffier, add a little bit more oats. Don't like banana's? No problem you won't taste it! If you are wanting some banana pancakes, add more banana!! This recipe is incredibly versatile, we add chocolate chips, berries, you name it. I will say that if I'm adding items I don't want blended in the batter, I add them at the end and mix them with a silicone spatula right in the blender so it's easy pouring onto the skillet!! If you don't have a blender, no problem. Use oat flour (or grind your oats with a coffee grinder) and mix by hand like you would normal pancakes. If I'm mixing by hand I mash the banana inside the skin by just squeezing it all over until it feels mushy. Then peel the banana and it will already be mashed. Add it to the almond milk and whisk together, then add your dry ingredients and finish whisking. The wonderful thing about these pancakes? other then that they taste delish?? They are gluten free, soy free, dairy free, egg free, vegan and 100% clean. We try to eat an anti-inflammatory, clean diet as much as possible and oats are the only grain that fall into that category. Our friends and family love these pancakes and are none the wiser that they are healthier. I hope that this blog finds everyone healthy and well. These are very unusual, uncertain times, and I hope experimenting with food can help bring your family together to enjoy one another, and enjoy food with out guilt, the way it has for our family. Feel free to watch Me and Emi cooking them up in our M & Em Kitchen Chronicles on my facebook page! Click here to watch: M & Em make Pancakes! Let us know how you like them!! Cheers! Marisa 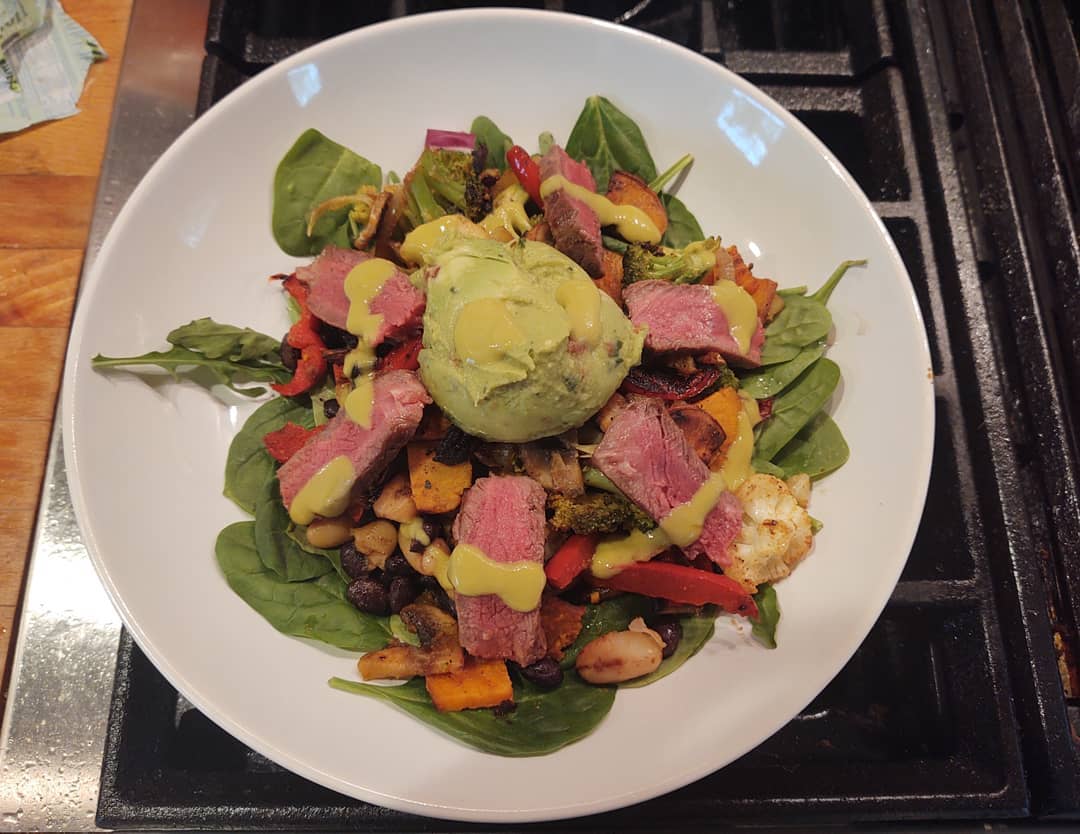 These are strange times indeed. On a normal day most of us are looking to eat healthy and not break the bank, but now that's even more of a concern. These days eating healthy can seem a reach, finances might be tight and we are limited even to what is available in the stores to buy. Before we dive into this "recipe" I want to preface that it is super flexible. I'm reluctant to call it a recipe because for us we were scavenging in our refrigerator at the time trying to decide what we could turn our random collection of produce and food items into... the answer is a lot!! More on that later :) Don't get stuck on the specific ingredients, there are no measurements really; it's what you have, added to taste. Let yourself be creative, use what you have on hand; I guarantee it will still taste great! 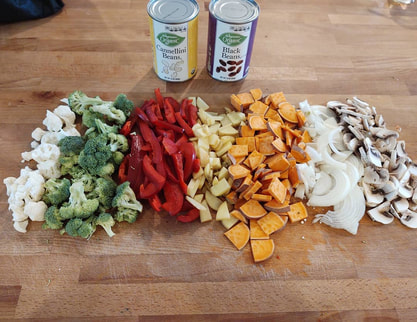 Okay, Lets get started!! We raided the fridge and pulled out all fresh produce we had left. We always keep cans of organic beans on hand because they can literally be added to ANY meal to stretch it, add protein and fiber content, turn a side or light meal into something more filling, and more!! We love beans!! (and they are cheap!! $0.99/can of Wegmans organic beans, all varieties) What we had available to us was: one red pepper that started to get wrinkly (it HAD to be used!), one small yellow onion, maybe 1/4 or less of a head of organic cauliflower, about 1/3 a bag of Wegmans organic broccoli florets, one medium organic potato (russet?? maybe??), one medium organic sweet potato, about 4 organic mushrooms (1/3 of a pint package maybe), a few handfuls of spinach, some guacamole and some Trader Joe's Jalapeno sauce (thanks Mom!!). Spices that we had on hand and used were Cumin, Chili Powder, Garlic Powder, Onion Powder and Cinnamon. This could make a vegan/vegetarian meal all in itself for 4-6 people for roughly $10 total!! ...But if you know my family, then you know our daughter Emi is a carnivore and Chris much prefers meat with his meals (I'm the veg only plate ;) So...we also used two Organic Grass fed NY strip steaks we pulled from the freezer the day before! Sometimes Emi will eat a steak a day, so when I found these on sale for buy one/get one, I loaded up the freezer! That brought our meal total to roughly $20. We all had dinner from it, and Chris and I had two days of lunch from it, plus left over steak for Em. Win Win! Use whatever meat you want or no meat at all!! 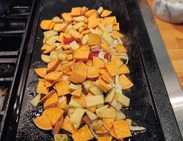 When you have pulled out whatever veggies you've found; slice them up. You can dice them or just slice them, it's really up to you! We cooked our veggies on our cast iron skillet so I started with the veggies that take longer to cook...potatoes! In all honesty, my go to is our skillet, and we like the way things taste on it, but just as easily (if not probably easier) you can roast these veggies in the oven at 425F, or on your outdoor grill in some aluminum foil (my second go to for quick cooking and clean up :) ) If you want to roast on your grill in foil, or cook in the oven toss all of your veggies with 2-3 tablespoons of olive oil, sea salt and your spices to taste. Roast for about 20-30 min in the oven, probably no more then 20min on a hot grill (we cook everything on our grill, on high) If you have a skillet and you're going to go that route, drizzle some olive oil on it and get your longer to cook veggies going first with some sea salt. 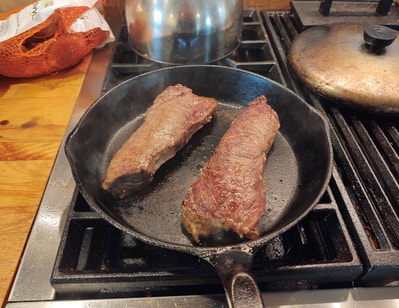 Once you've gotten your potatoes going (or you have gotten your veggies in the oven or on a gas grill) heat a skillet to med high heat with a tablespoon or two of olive oil. If you're grilling, just throw it on a hot grill, again we cook on high, all burners. Pat dry your meat, salt and pepper it to taste, and put it on the hot skillet to cook! Skip this step if you're keeping it vegetarian or vegan. If you're cooking meat, use whatever meat you'd like however you'd like to cook it!! Using the skillet and our outdoor gas grill are typically the top methods we like to use. For these 1.5" NY Strips I'd say they probably cook for about 4-6min/side for med to med-rare; turning them at least twice each side on a medium-high heat. 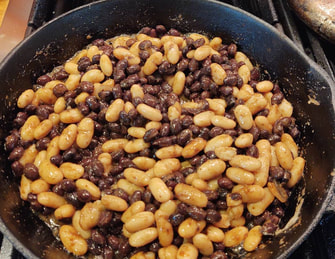 Once your meat is started, if you're cooking it, go ahead and add the rest of your veggies to the skillet and season them! Once they are seasoned use a tong to carefully toss them and mix them, you can also drizzle some water over them to create some steam and speed up the cooking process. Toss these a couple of times in between flipping your steaks. If you are roasting your veggies, go ahead and get another pan out with 2 tablespoons of olive oil to start your beans! I cooked our beans in the cast iron pan once the steaks were done and were "resting" but it doesn't matter how or where you cook them, do what works and is most convenient for you! We seasoned our beans with the same spices on the veggies, but I added cinnamon as well, it creates a really nice flavor with the other spices. Once your meat is done, go ahead and put it on a plate or cutting board to rest for a few minutes. The beans are a quick cook! You are just looking to heat them and blend the spices. When everything is done, plate it how you'd like to! We made ours as bowls over spinach greens. Topped with some guacamole and the Trader Joe's Jalapeno sauce (my Mom is addicted to this sauce and passed some on to us, we love it too!) Emi's plate consisted of steak, beans, and mostly her favorite veggies picked from our mix (broccoli and cauli) You can have this however you want; nachos, tacos, burritos, with rice, in an omelette or "breakfist stir"...the possibilities are endless. I also want to add it doesn't have to be "burrito" style. These things cooked fresh with sea salt, olive oil and any seasonings are delish... Instead of the cumin and chili you can add basil, just do garlic and onion, use adobo, or fresh spices if you have them. It is truly so versatile. Make it yours, and enjoy! LEFT OVERS!!! INGREDIENTS List As Pictured with cost: 1 organic red bell pepper ($2.49) 1/3 bag Wegmans organic broccoli florets ($1.15) 1 organic yellow onion ($0.69) 1 organic sweet potato ($0.50) 1 organic potato ($0.45) 1/4 ish head of organic cauliflower ($0.60) 3-4 organic white mushrooms ($0.75) 2 cans organic beans ($1.98) Few handfuls of Greens ($1.50) Guacamole single serve cup (or one avocado $1.00) 2 Organic Grass Fed NY Strip Steaks (they were "bogo" $10.00) Spices on hand: cumin, chili, garlic powder, onion powder, cinnamon, sea salt and pepper |
Created by: Marisa MangiameliChris's better half, Emi's Mom, small business owner, entrepreneur, health and wellness enthusiast, alternative eating explorer-creator, animal lover, people lover, foodie... :) ArchivesCategories |



 RSS Feed